 Figure 3-1 Main Menu
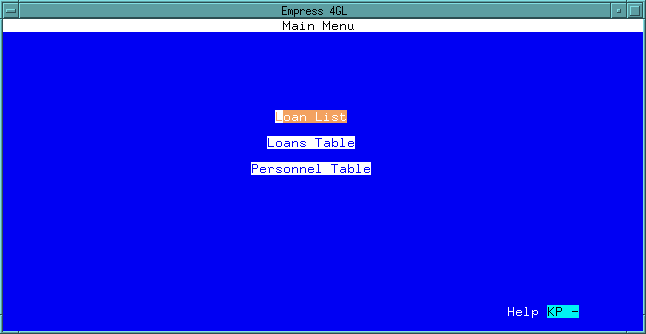
For example, when an application called loansinfo is created
using the Application Generator, the following menu appears on the screen:
Figure 3-1 Main Menu
If you move the cursor to Loan List and press <Return>, an application based on the loans and personnel table is run. It displays the name, date, and amount from the loans table and the corresponding phone and credit_limit from the personnel table. It is also restricted to read only information.
If you move the cursor to Loans Table and press <Return>, an application is run which displays a window from which you can select, update and delete information in the loans table.
If you move the cursor to Personnel Table and press <Return>, an application which displays a window from which you can select, update and delete information in the personnel table.
To create this application, follow these steps:
Step 1
Create the application called loansinfo using the Application
Generator and define the Menu Definition as:
Step 2
Create the loanlist application using the Application Generator to define:
Create two default applications with the names loans and personnel.
At this stage, you have completed your application development.
In the previous section, we discussed how to create a default application. In the next few sections, we will show you step by step how to create the loanlist and loansinfo applications using the Application Generator.
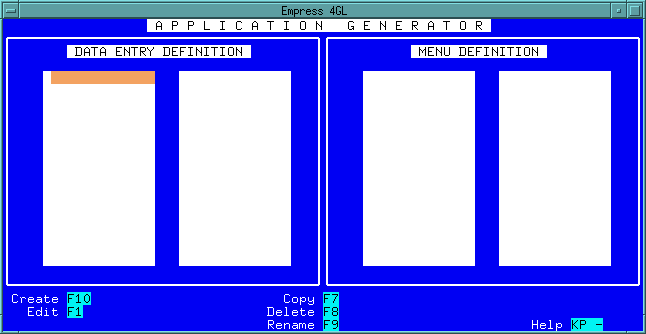 Figure 3-2 Application Generator
In this screen, the Application Generator lists the names of the Data Entry Definitions and Menu Definitions if there are any. You can edit an existing definition or create a new definition. It also allows you to copy, delete and rename the applications.
Press the Create key and enter the Data Entry Definition
name as loanlist on the following screen:
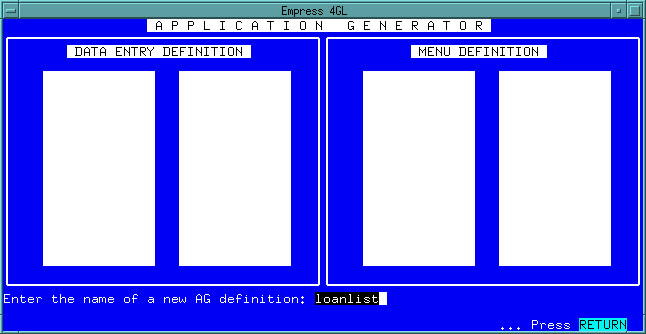 Figure 3-3 loanlist
Since the application loanlist will be generated based on the definition, it is easier to name the Data Entry Definition with the same application name.
When the <Return> key is pressed, you will enter the Data Entry
Definition menu screen:
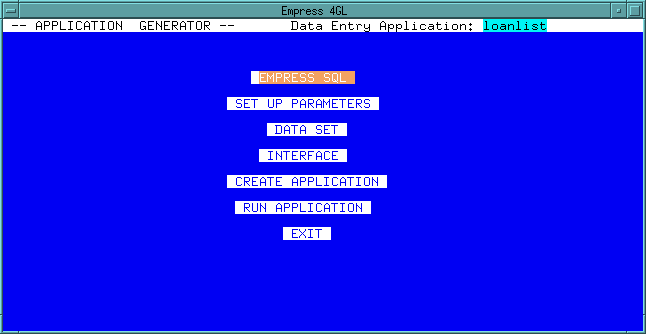 Figure 3-4 Data Definition Menu
From this menu you can invoke the following functions:
Table 3-1
| Option | Function |
| EMPRESS SQL | Escapes to an Empress SQL session. |
| SET UP PARAMETERS | Determines how fields will appear on the screen. |
| DATA SET | Chooses tables and attributes to be used in the application. It also determines sort order and select conditions. |
| INTERFACE | Chooses the functions to be made available, the field labels that will appear on the screen, and other details of the screen display. |
| CREATE APPLICATION | Confirms your choices for the application definition and creates the application. |
| RUN APPLICATION | Runs the application. |
| EXIT | Exits to the Application Generator Main Menu. |
When you move your cursor to the SET UP PARAMETERS field and press
<Return>, you can define how fields will appear on the screen:
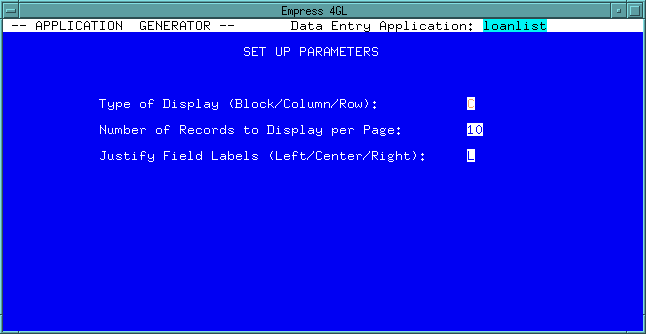 Figure 3-5 Setup Parameters
3.2.1 Type of Display
The display type may be either "block", "column", or "row".
"Row" produces a display like the following, with one record per screen:
record1 label1: field1
label2: field2
label3: field3"Column" produces a display like this:
label1 label2 label3
record1 field1 field2 field3
record2 field1 field2 field3Block creates a display like this:
record1 label1: field1 label2: field2
label3: field3
record2 label1: field1 label2: field2
label3: field3
3.2.2 Number of Records to Display per Screen
You may display as many records as will fit on the screen.
3.2.3 Justify Field Labels
May be either "left", "center", or "right" justified.
"Right" justification creates a display like this:
name:
date:
amount:
phone:
credit_limit:"Center" justification creates a display like this:
name:
date:
amount:
phone:
credit_limit:"Left" justification creates a display like this:
name:
date:
amount:
phone:
credit_limit:
When you complete the set up, press the Quit key (obtained from the Help screen) to return to the Data Entry Definition menu.
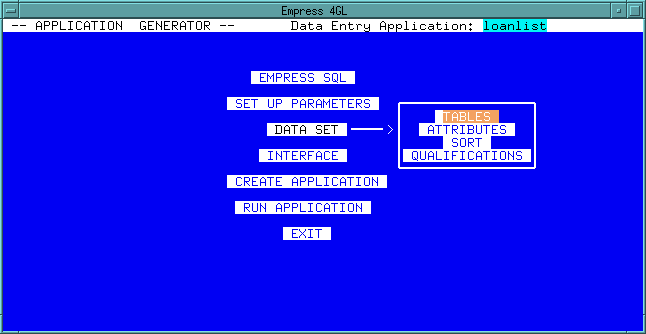 Figure 3-6 Data Set
Move the cursor to Tables and press <Return> and the following
screen appears:
 Figure 3-7 Table Selection
You may choose from tables in the current database, by pressing the
List Tables key:
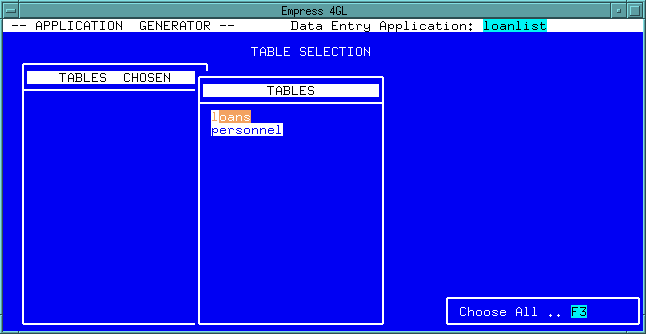 Figure 3-8 List of Tables
You can press the Choose All key to choose all the tables or
move the cursor to fields under the listing of TABLES and press
<Return>. The table name(s) which you have chosen will appear in the
listing of the TABLES CHOSEN.
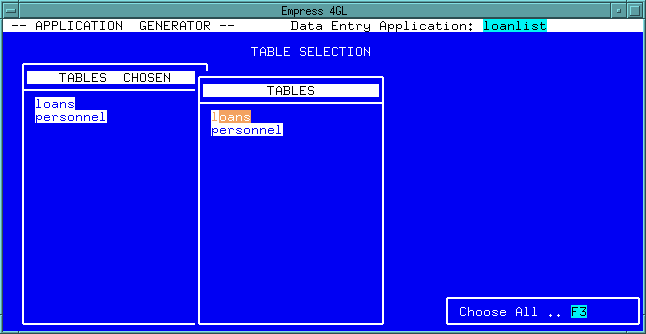 Figure 3-9 Tables Chosen
Press the Quit key to return to the TABLE SELECTION screen and press the Quit key again to return to the Data Entry Definition menu.
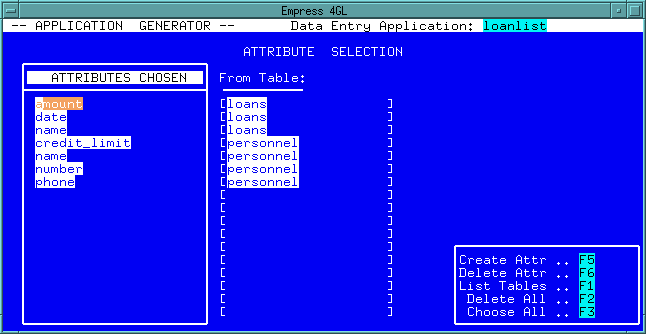 Figure 3-10 Attribute Selection
From here you can:
Table 3-2
| Options | |
| Create Attr | Choose the attributes to be in the application. |
| Delete Attr | Remove attributes not required in the application. |
| List Tables | Lists the tables and attributes available. |
| Delete All | Deletes the entire list of ATTRIBUTES CHOSEN. |
| Choose All | Chooses the entire list of attributes available for the current application. |
Carefully examine the SELECT statement:
SELECT name, date, amount, phone, credit_limit
FROM loans, personnel
WHERE loans.name = personnel.name
SORT BY date;The only attribute that is not mentioned in this statement is number in the personnel table. You can remove the number attribute from the list by moving the cursor to number and then press the Delete Attr key.
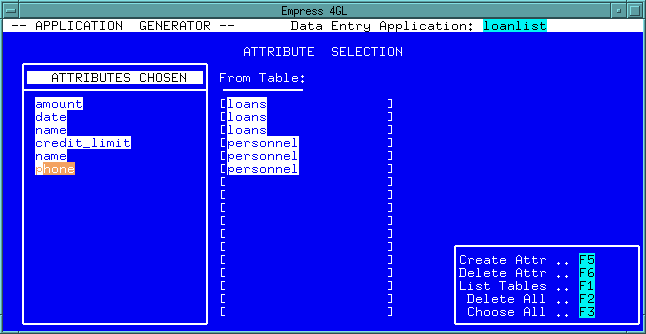 Figure 3-11 Attribute chosen
Press the Quit key to return to the Data Entry Definition menu.
 Figure 3-12 Sort Selection
From this screen, you can choose the attributes by which your output will be sorted. By assigning numbers to attributes, with 1 representing the first sorted attribute, the output will be sorted in the specified order.
In this case, move the cursor to the date field and type in
1.
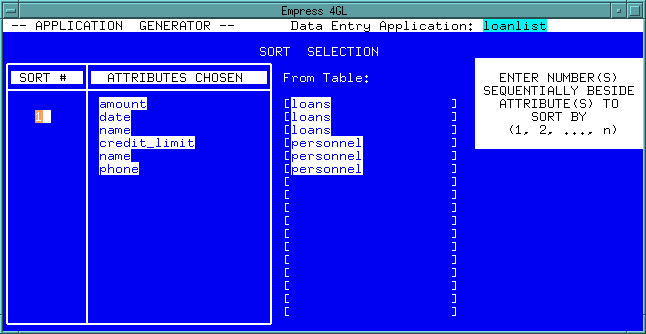 Figure 3-13
Press Quit to return to the Data Entry Definition menu.
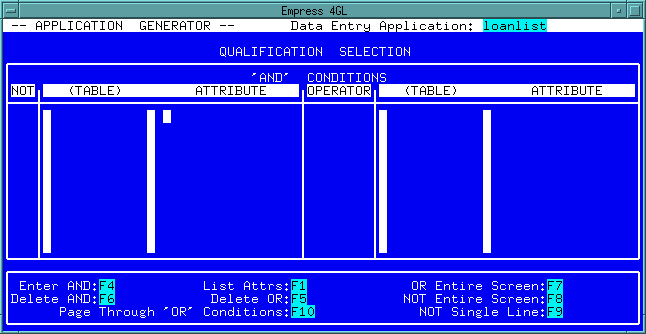 Figure 3-14 Qualification Selection
This is the screen from which you may specify the WHERE clause for the SELECT statement. For example:
WHERE loans.name = personnel.nameIn order to begin creating a qualification, first press the Enter AND key. The following screen appears:
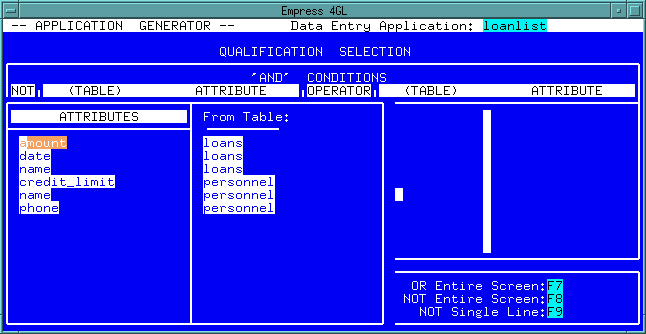 Figure 3-15
Move the cursor to the attribute name of the loans
table and press <Return>. It shows the table loans and the
attribute name.
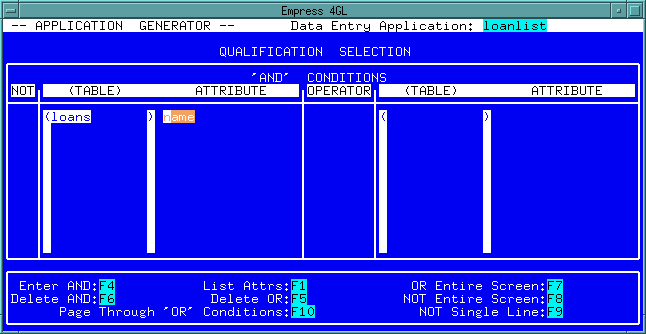 Figure 3-16
Move to the next field (press the NEXT_FIELD key) and the available
operators are listed:
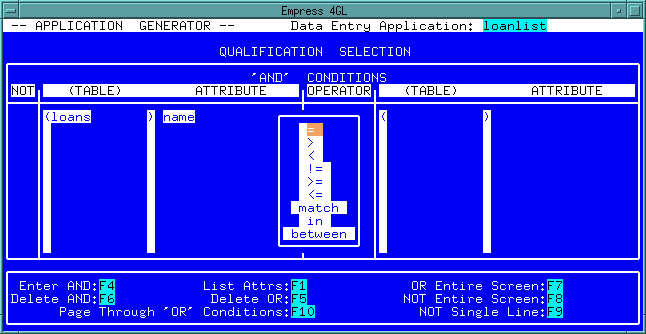 Figure 3-17
Choose "=" by moving the cursor to "=" then press <Return>.
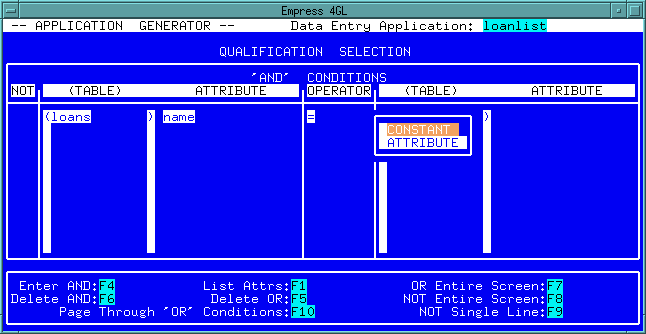 Figure 3-18
This is to specify an item on the right hand side of the operator, i.e.,
loans.name = ? where "?" can be a constant or another attribute.
In this case move the cursor to ATTRIBUTE and press <Return>.
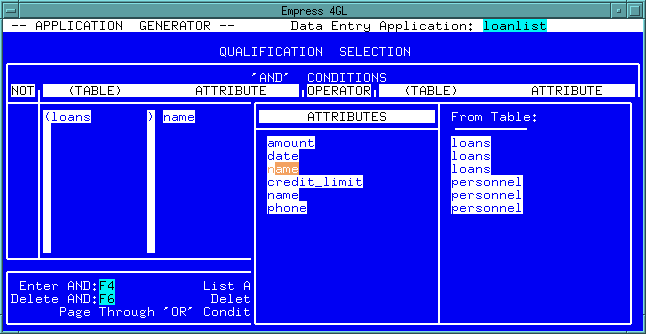 Figure 3-19
Again, move the cursor to name from the personnel
table and press <Return>.
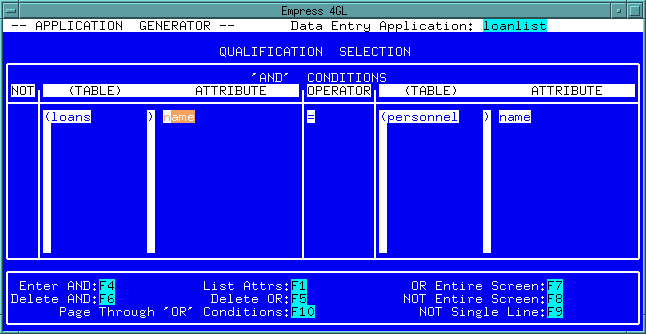 Figure 3-20
Now you have completed the QUALIFICATION SELECTION.
Press the Quit key to return to the Data Entry Definition menu and press the Quit key again to remove the DATA SET sub-menu.
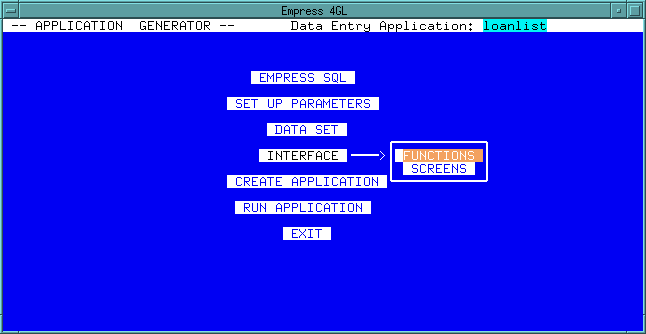 Figure 3-21 Interface
Move the cursor to FUNCTIONS and press <Return>.
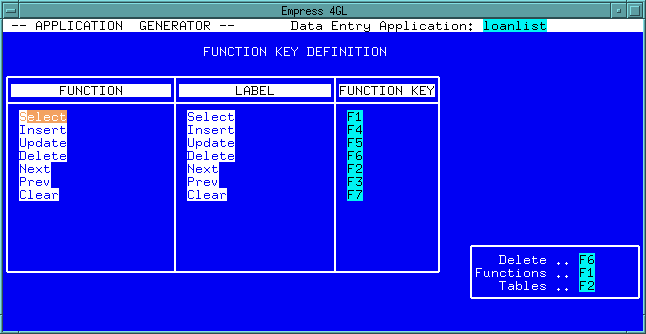 Figure 3-22 Function Key Definition
From here the following functions are available:
Table 3-3
| Options | Function |
| Delete | Removes a function and its associated label and key from the function list. |
| Functions | Lists and selects from the functions available. They are: Select, Insert, Update, Delete, Clear, Next, Previous, Call Appl/Menu, and Reserved. |
| Tables | Lists the available tables; you may select those for which the functions will be available. |
| Keys | You can assign a function key to each function. When you press these keys, Empress 4GL will perform the function associated with that function key. |
| Labels | You can also choose labels for the functions. Labels and their associated keys appear in a menu at the bottom of the application screen. |
In this example, for this application to have read only functionality,
move the cursor to the Insert field and press the Delete key.
Follow the same steps to delete the Update and Delete
function keys.
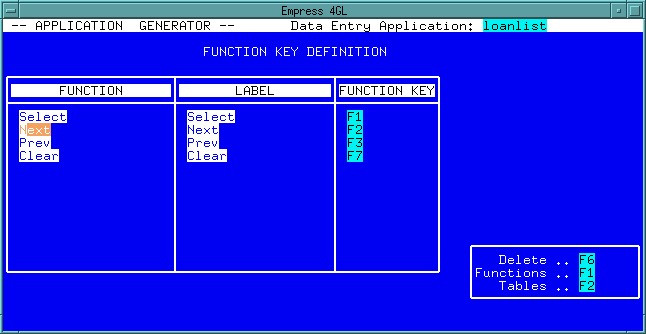 Figure 3-23
Press the Quit key to return to the Data Entry Definition menu.
 Figure 3-24 Screen Customization
At this point, the cursor is in the Page Label field. To move
to the (TABLE) ATTRIBUTE area, press the `Edit Attributes'
Menu key. Now the cursor is in the (TABLE) ATTRIBUTE area
from which the following functions are available:
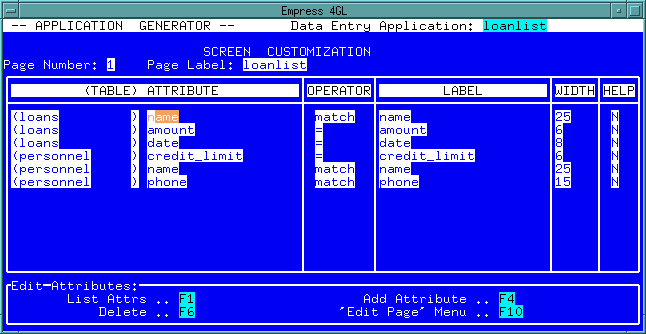 Figure 3-25
Table 3-4
| Options | |
| List Attr | Lists the available attributes. |
| Delete | Removes an attribute from the screen display. |
| Add Attribute | Selects an attribute to appear in the screen display. |
| `Edit Page' Menu | Change back to creating new pages and editing page headings which appear on top of pages. Multi-record applications can only have one page. |
Since loans.name and personnel.name are the same thing,
we can delete one of them from the display screen. Move the cursor to (personnel)
name field and press the Delete key to remove it from the
list.
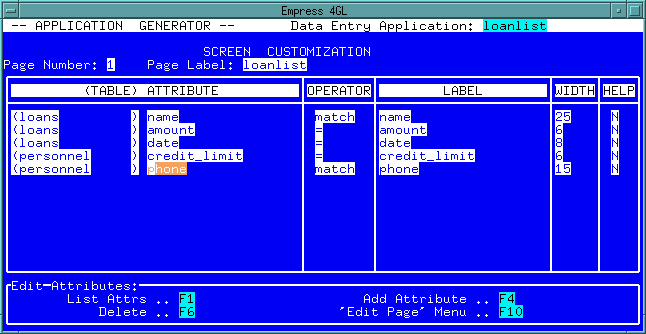 Figure 3-26
Whenever the cursor is moved to the OPERATOR field, the following
screen is displayed:
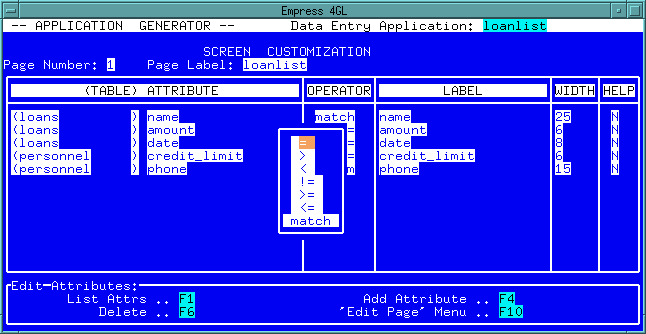 Figure 3-27
When you press the Select key, the selection criteria as defined in this menu will be evaluated.
The label for the attribute value is the default attribute name. You
can modify the label for a more presentable format.
 Figure 3-28
You may also modify the width of the display area or add a brief help message for each field. Once you have the completed the modification, press the Quit key to return to the Data Entry Definition menu.
Note
If the window is not big enough for the data to be displayed in columnar format, it will be displayed in block format. The forms and the script that were generated by the Application Generator can be modified through the Form Manager and Application Manager.
At this point, we have completed the loanlist application.
You can run the application or exit the Data Entry menu. To exit, move
the cursor to EXIT and press <Return>. You will see:
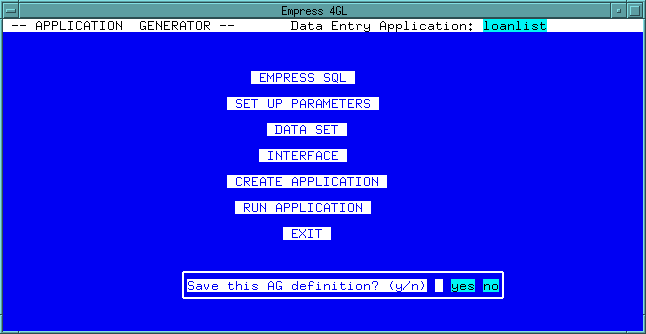 Figure 3-29
You can save this definition by answering y at the prompt.
To create a menu linking two or more applications, move the cursor to
the field Menu Definition from the Application Generator Main
Menu and press Create key. The following screen will appear:
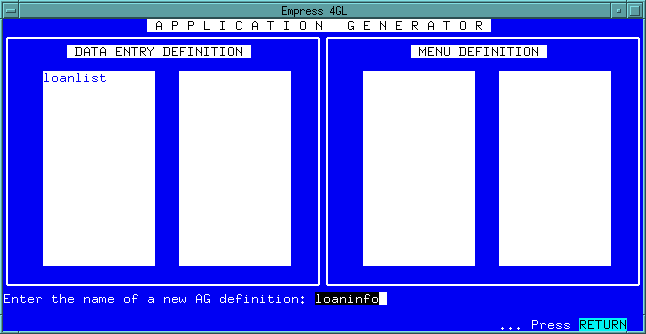 Figure 3-30 Application Generator
Enter the name of the Menu Definition beside the prompt "Enter the name of a new AG definition:"
In this example, type in loansinfo. When the <Return> key
is pressed, this is what you will see on the screen:
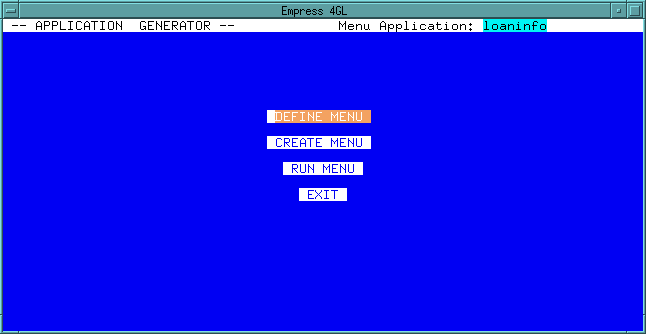 Figure 3-31
Move the cursor to DEFINE MENU and press <Return>. The following
screen appears:
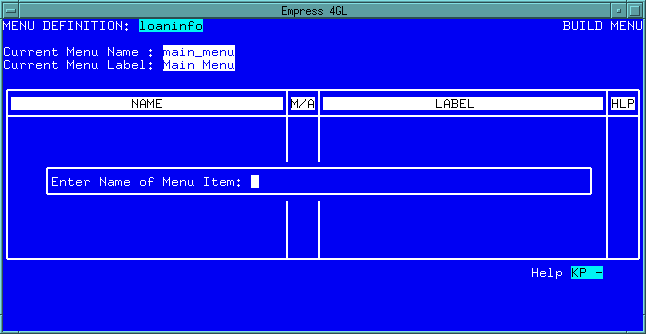 Figure 3-32
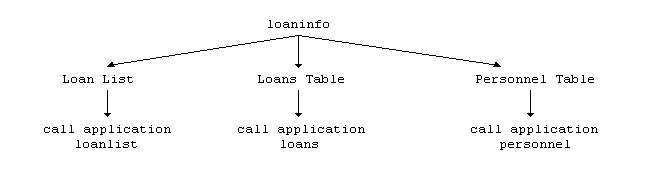
This is where you start to build a hierarchical menu system. Each item on the menu has the ability to call other menus or applications from the next level.
For example:
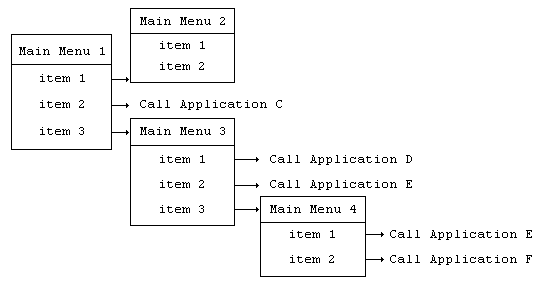
Our example is a simple one:
Enter loanlist and press <Return>. This is what appears
on the screen:
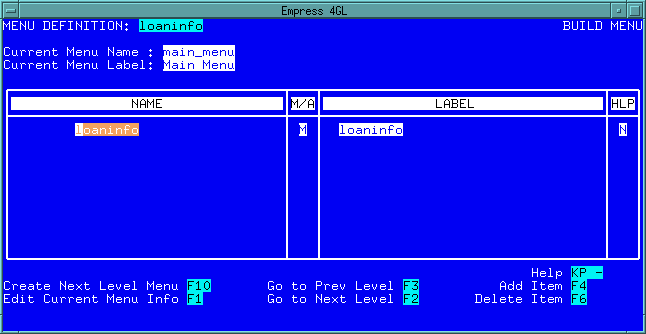 Figure 3-33
Move the cursor to the M/A field then move the cursor from
the MENU field to the APPLICATION field.
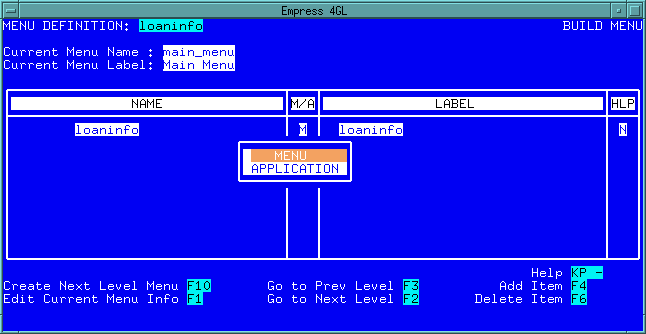 Figure 3-34
Change the LABEL field to Loan List. This is what
will appear on the screen:
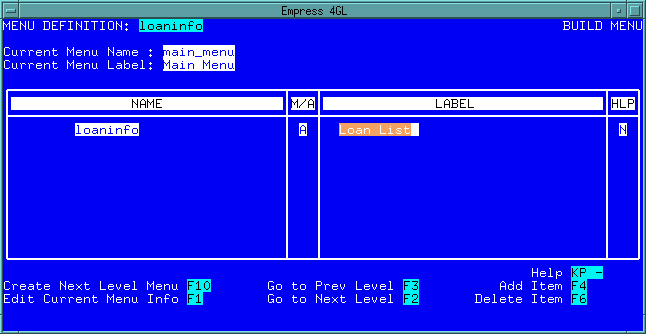 Figure 3-35
Apply the same steps to the other two items.
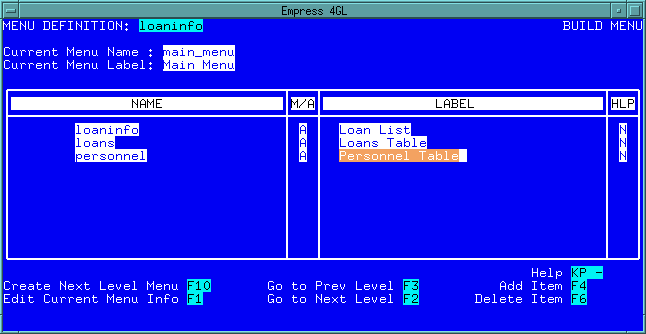 Figure 3-36
Once this is done, press the Quit key to return to the Menu
Definition menu. Move the cursor to CREATE MENU and press
<Return>. This will create the menu definition. When this is done, move
the cursor to RUN MENU and the following screen appears:
 Figure 3-37
When you exit the Menu Definition menu, you can decide whether
or not to save this Menu Definition. If you do, this definition can be
edited and modified through the Application Manager and the Form Manager.
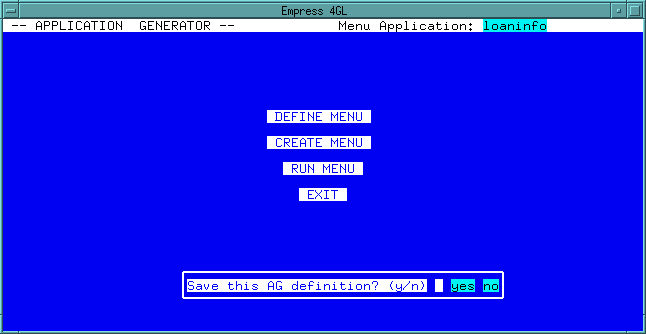 Figure 3-38
Press the Quit key to return to the Application Generator Main Menu. You can save the definition by answering y at the prompt.