
Figure 2-1 Application Manager
Empress GUI Builder provides a Default Application Generator which creates an application to allow the user to perform basic SQL functions on a given table. The Default Application Generator works with one table at a time and allows the users to insert, delete and update records in a table. The table for which the default application is created must exist in the current database of Empress GUI Builder before an application can be generated on that table.
For example, a table named employee in the database named my_db has the following attributes:
*** table: employee ***
name character
(25,1)
address text (20,20,16,1)
phone character
(20,1)
salary dollar (10,1)
Figure 2-1 Application Manager
A dialog box pops up asking the user to enter the name of the table on which to create the default application and the name of the application.
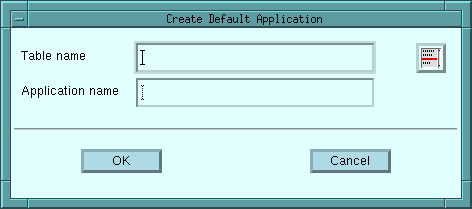
Figure 2-2 Dialog Box
If you wish to view a list of the tables in the current database, click on the list icon beside the table name field.
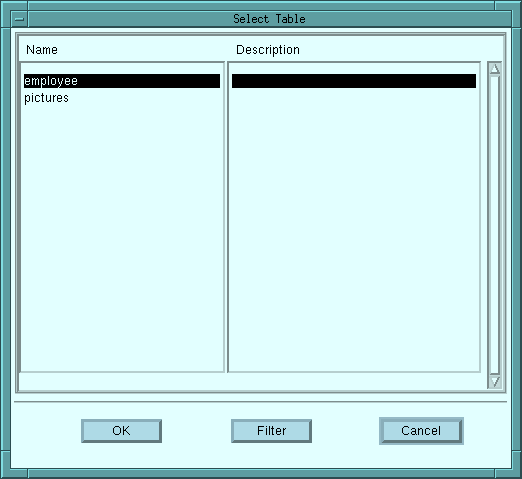
Figure 2-3 List of Tables
You may choose any table from the list. Once you have entered the table name and the application name, and click on the OK button and the default application is generated. Since the default application deals with only one table, it is a good idea to name the application the same as the table name.
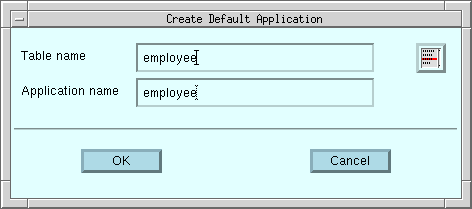
Figure 2-4 Creating the Default Application
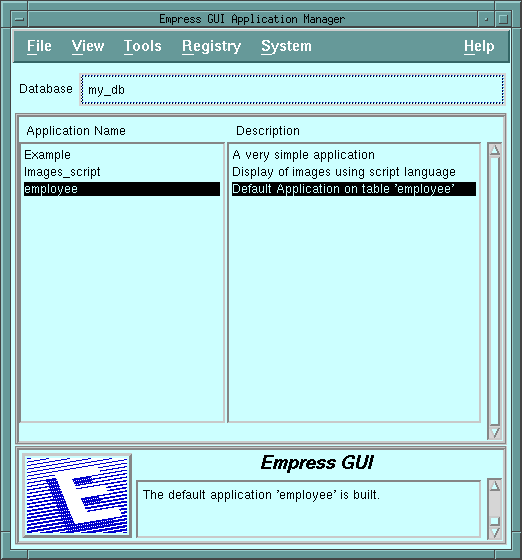
Figure 2-5 Application Manager
Click on File from the menu bar and click on Run from the pull-down menu. The default application will run as shown in Figure 2-6.
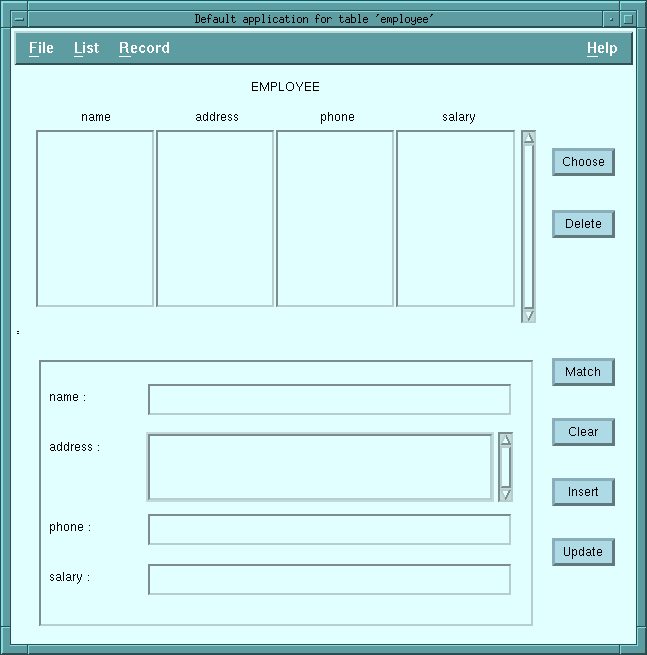 Figure 2-6 Default Application
The title on the title bar and the heading in the window corresponds to the table name on which the application is created. The application window is divided into the following two sections:
| In the multilist window: | 1 attribute
2 attributes 3 attributes 4 attributes |
64 characters for the heading
32 characters for the heading 21 characters for the heading 15 characters for the heading |
| In the record window: | 15 characters |
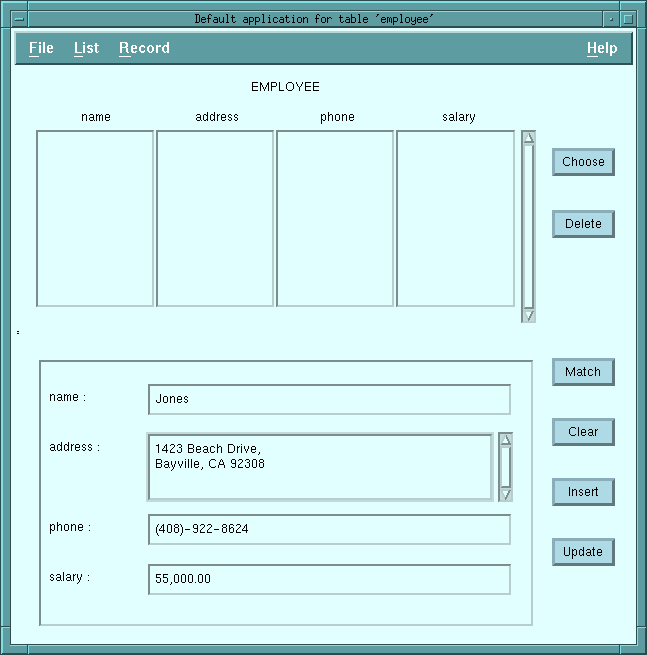 Figure 2-7 Inserting a Record
Click on the Insert button or click on Record from the menu bar then click on Insert from the pull-down menu. Now the record is inserted into the employee table and this record will also be displayed in the multilist window.
 Figure 2-8 Record inserted
Now, you can insert more records as shown in Figure 2-9:
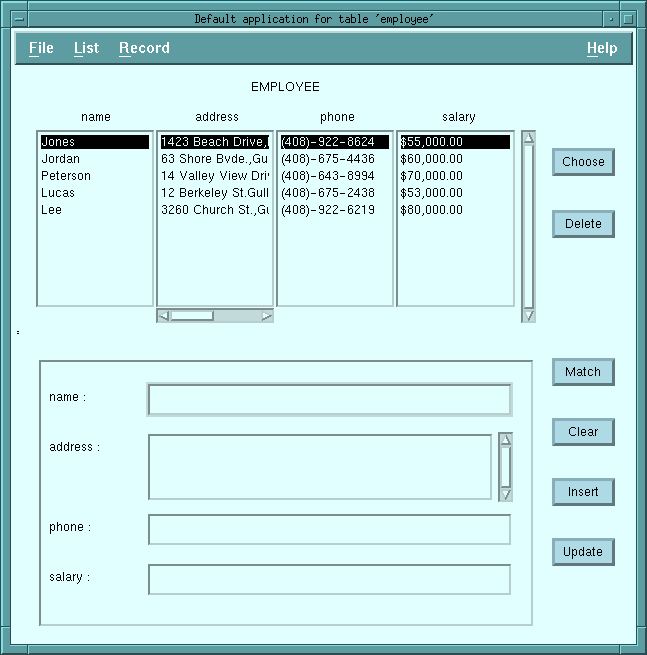 Figure 2-9 Inserting more records
2.2.2 Selecting Records
If you wish to select all the records on the table, simply click on the
Match button. Otherwise, type in the same specific values for
the attributes as the selection criteria, for example, J* for
the name attribute and click on the Match button. The following
screen appears:
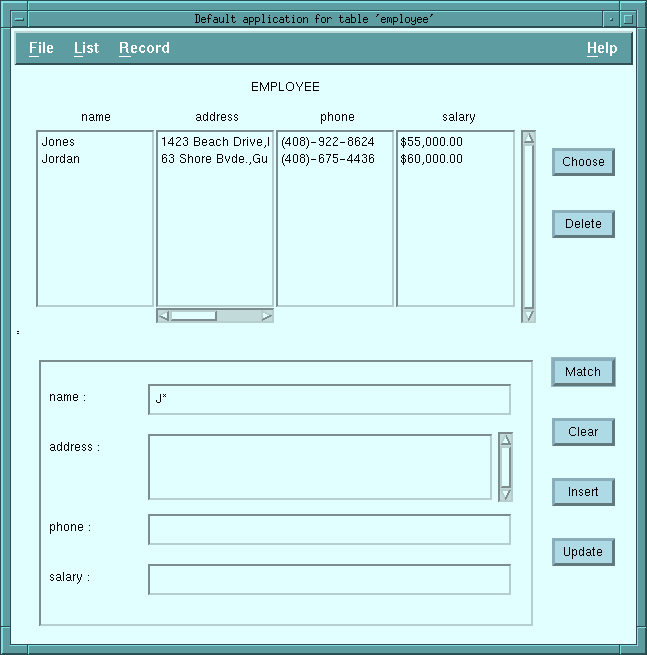 Figure 2-10 Matching specific values
There are two records which satisfy the match condition. Instead of clicking on the Match button, you can also click on Record from the the menu bar then click on Match from the pull-down menu to select records.
The match pattern must conform to the standard supported by Empress
SQL.
2.2.3 Choosing Records
Choosing a record from the multilist will make it display in the record
window. There are three basic ways to choose a record.
One way to choose a record is to double-click on that record in the multilist. A second way is to select that record by single-clicking on the record in the multilist and to click on the Choose button next to the multilist. A third way is to select that record by single-clicking on the record in the multilist and to click on the List from the menu bar then click on Choose from the pull-down menu.
Once a record is chosen and displayed in the record window, it becomes the current record. The record window can then be used to see the values of all the attributes for that particular record. The record window can be also used to update the record.
For example, to choose the employee name Jordan from the list, double-click on the record named Jordan on the multilist.
The following screen will appear:
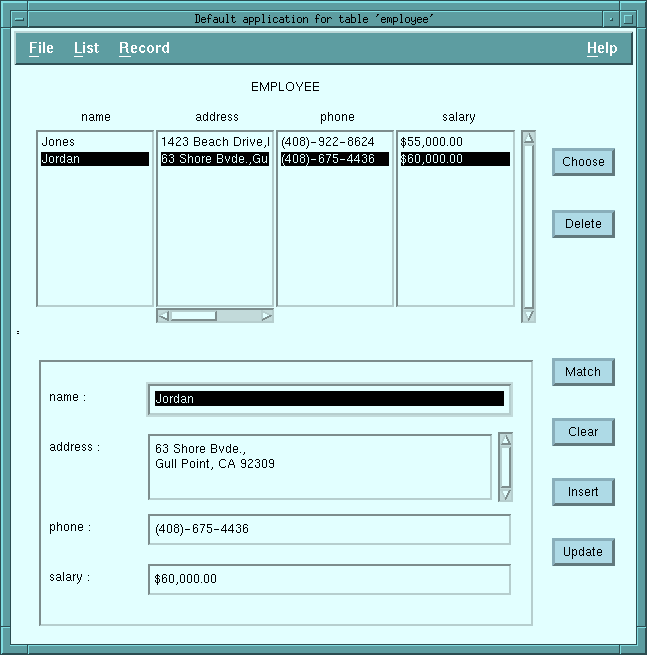 Figure 2-11
2.2.4 Updating Records
To update a record, you must make sure that the record which needs updating
is in the record window. For example, to update Jordans salary from $60,000
to $65,000, choose the record from the multilist as shown below.
Figure 2-12 Updating a record
Move the cursor to salary and edit the salary amount from $60,000 to $65,000. Click on the Update button.
Click on Record from the menu bar then click on Update from the pull-down menu. Note that the value on the multilist will also be updated.
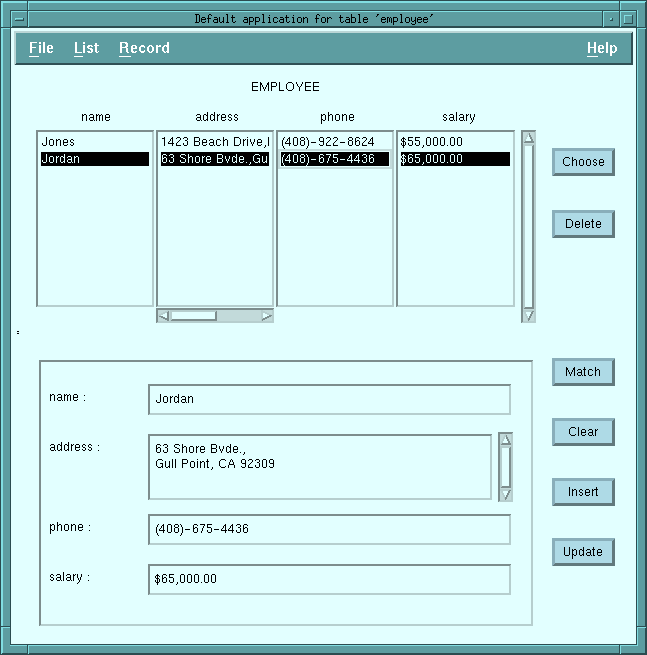 Figure 2-13
While updating a record into the table, Empress GUI Builder
checks for the validity of data types of all the values in the record window
with the type of the corresponding attributes of the table and will report
any inconsistencies, if they exist.
2.2.5 Deleting Records
To delete a record, you must make sure that the record which will be deleted
is in the record window. For example, to delete the record named Jones,
select the record from the multilist and confirm that the record shown
in the record window is indeed the record that needs to be deleted.
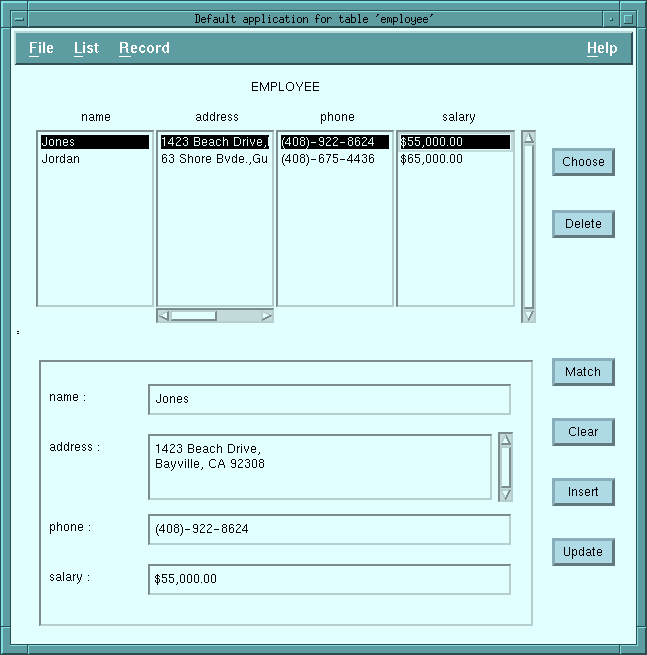 Figure 2-14 Deleting a record
Click on the Delete button or click on List from the menu bar then click on Delete from the pull-down. A dialog box will appear to confirm the deletion.
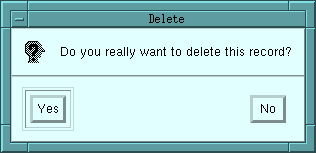
Figure 2-15 Confirmation
Click on the Yes button on the dialog box to delete the record.
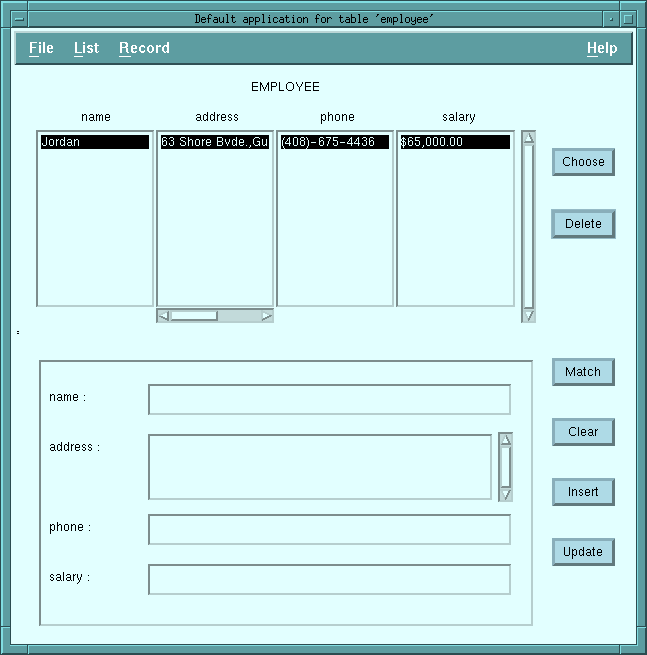 Figure 2-16
2.2.6 Clearing the Record Window
Many times while using the default application, you may find it necessary
to clear the record window to be able to further use it. There are two
basic ways to clear the record window.
One way to clear the record window is to click on the Clear button next to the record window. A second way to clear the record window is to click on Record from the menu bar then click on Clear from the pull-down menu.
Figure 2-17 Exiting the Default Application
Figure 2-18 Deleting the Default Application
Click on File from the menu bar then click on Delete from the pull-down menu. A dialog box will appear:
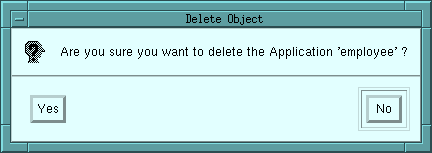
Figure 2-19
To confirm the deletion, click on Yes. The employee application is deleted from the list.
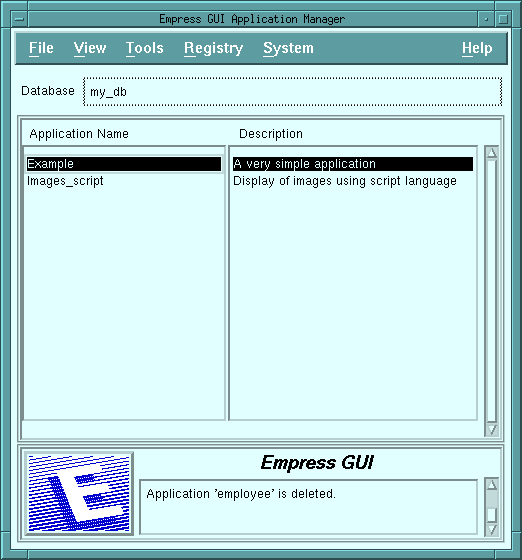
Figure 2-20