Figure 4-1 Application Manager screen
This chapter will provide you with two sample applications and step-by-step tutorial for creating the applications.
To begin, you will need an Empress database. (If you created a database in the previous chapter, please make sure it has been removed.)
You will also need to import the sample data file provided, to make your results match the examples. Run:
$EMPRESSPATH/rdbms/gui/mktutor
where EMPRESSPATH is set to the full path of the directory in which Empress is installed. This command will create the database, emptutdb. It will import a data table (employees) to be used in the second application, and finished examples of the tutorial applications, which you can use for checking.
Start Empress GUI Builder with:
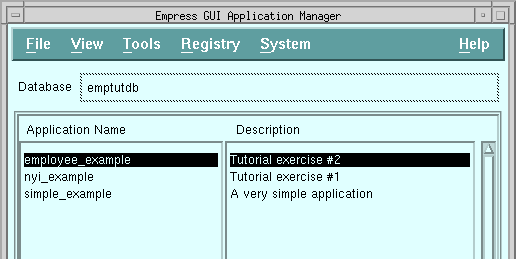
empgui emptutdbYou should see the Empress logo screen followed by the Application Manager screen, looking something like Figure 4-1.
Figure 4-1 Application Manager screen
You will see that now we have three sample applications in our database:
employee_example, nyi_example and simple_example,
These are similar to the ones we will build in the tutorials, and are provided
for reference.
4.1.1 Application Definition
The first step in creating an application is to define the application.
This can be done simply by providing the application name:
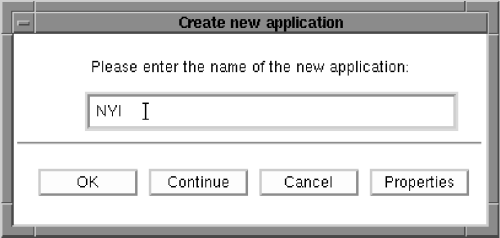
Figure 4-2
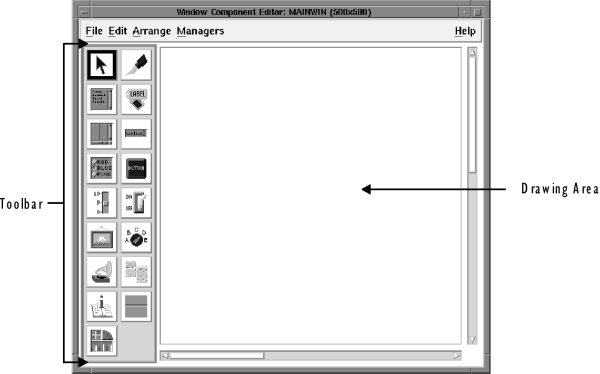
Figure 4-3 Window Component Editor
The Window Component Editor contains a large drawing area on the right, and two columns of tools in the toolbar on the left.
If you clicked on OK instead of Continue, you will not see this screen. You will have to click on Tools in the menu bar, and then MAINWIN Component Editor in the pull-down menu, to get to the same spot.
The components in the tool bar is as follows:
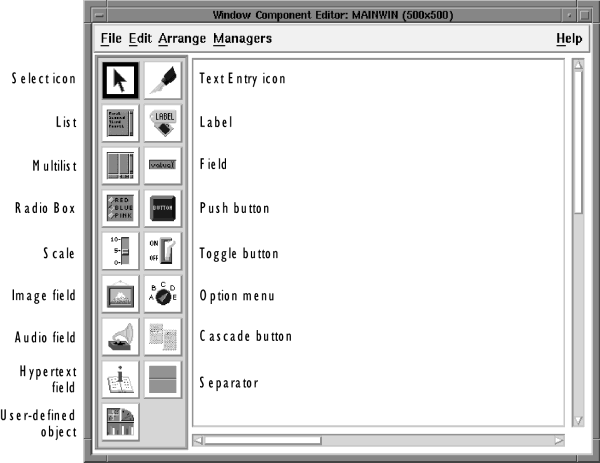
Figure 4-4 Toolbar Components
4.1.3 Selecting and Positioning a Component
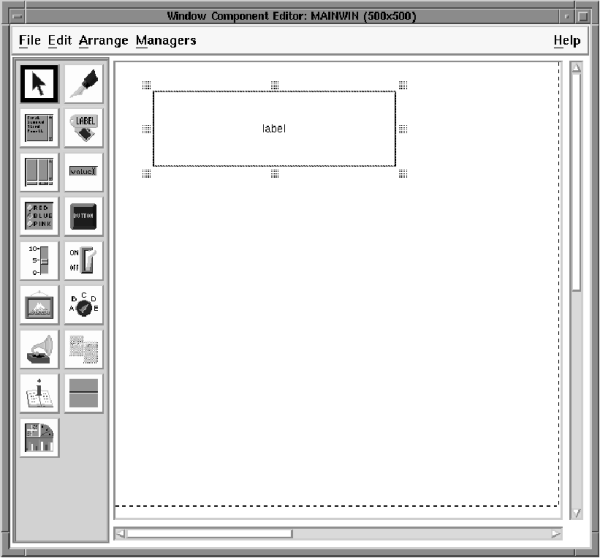
Figure 4-5 Window Component Editor
You have created a label of a certain size by dragging its outline within the drawing area. You can also create a default label of a default size.
This is done by clicking on the label icon again, and then clicking in the window area, without dragging. A default label will appear. The default properties for labels are size, color, and font. If you create a default label, it will inherit all three default properties. If you use the click-and-drag technique to create a custom label, it will not inherit any of the properties. However, you can resize a default label after creating it, without losing the font and color properties it was created with.
If you want to resize a default label (or any label), click on the label in the drawing area. This will cause checkered handles (squares) to appear at the outside edges and corners of the object. Select one of the checkered squares with the mouse pointer and drag the side or corner to which it is attached. You should see the object grow in size.
To move the whole thing:
Select them and invoke Edit, Delete from the menu bar.
You should be left with only one label, as in Figure 4-5.
4.1.5 Text Entry
To put some text into the label, select the Text Entry icon from the toolbar.
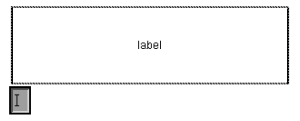
Figure 4-6
If you dont like the appearance of your label, you can open the text entry field again (in the same way) and edit the text, or you can change the label size by first selecting the label and then dragging one of the handles.
Your window should look like this with the label in it.
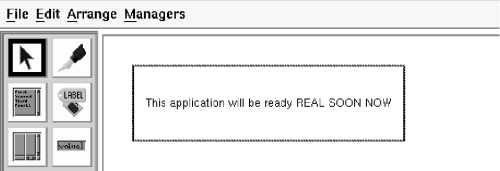
Figure 4-7
4.1.6 Saving Your Window
Select File, Save & Exit from the menu bar.
You will be brought back to the Application Manager. You will see your (partial) application in the application list, like this:
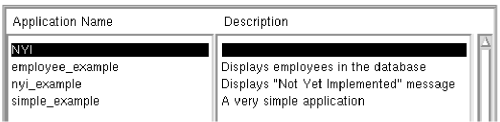
Figure 4-8 Application List
4.1.7 Application Module Manager
Next, you will give the application window a title, which will appear at
the top of the frame.
Make sure that your application is highlighted in the application list.
(Please note that, as an alternative to selecting Tools, Application Module Manager from the menu bar, you can double-click on the application name to get to the same place.)
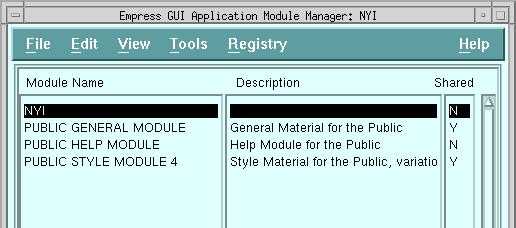
Figure 4-9 Application Module Manager
Your module will be named automatically, probably NYI. If you
have made more than one attempt to create it, you may see something like
NYI_main000, as in the illustration. Dont worry about minor variations
created by the program.
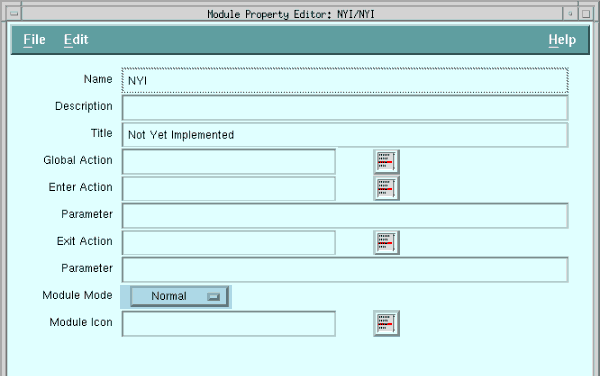 Figure 4-10 Module Property Editor
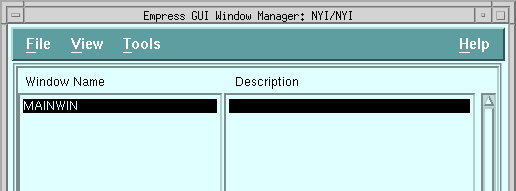
Figure 4-11 Window Manager
Within the Window Manager, select File, Properties
from the menu bar. This will invoke the Window Property Editor.
4.1.9 Window Property Editor
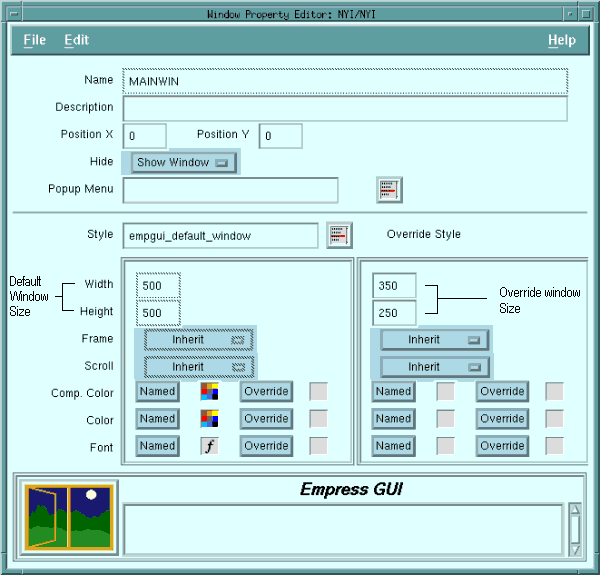
Figure 4-12 Window Property Editor
The Window Property Editor keeps track of specific characteristics of windows, including size, styles applied to it, and whether there is a pop-up menu associated with it. The screen will show you the size allocated for the window, probably 500 pixels by 500.
Your running application may look like this:

Figure 4-13 Not Yet Implemented application
(Notice that Empress automatically supplies the menu bar with the File and Help buttons.)
If you find that your label is not centered, or is cut off within the window, you may want to fix it. Take these steps to move the label within the window:
If this is a convenient place to take a break, select File, Exit from the menu bar to return to the operating system.
empgui emptutdbAfter the Empress logo comes up, you will see a screen similar to this:

Figure 4-14 Application Manager
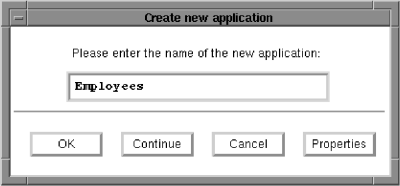
Figure 4-15 Employee name in dialog box
(If you clicked on OK, which would take you back to the Application Manager, you can bring up the Window Component Editor by selecting Tools, MAINWIN Component Editor from the Application Manager Toolbar.)
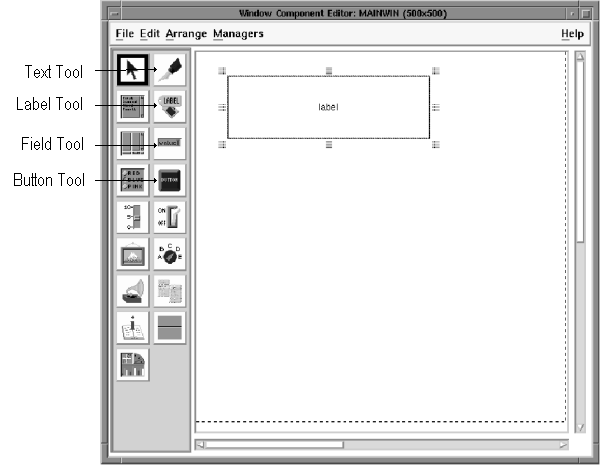 Figure 4-16 Window Component Editor - labelled
Select the label button in the toolbar. Its border should be highlighted once it is selected.
Click somewhere about the middle of the screen, at the top. You should get a default-sized label. Drag the label out until it is a reasonable size to hold a string like Employee Application.
(If you hold down the select button while you are in the drawing area of the window, you can start to drag out the label immediately. If you release the button, you will have to select one of the handles to drag.)
Your screen will look like this Figure 4-17:
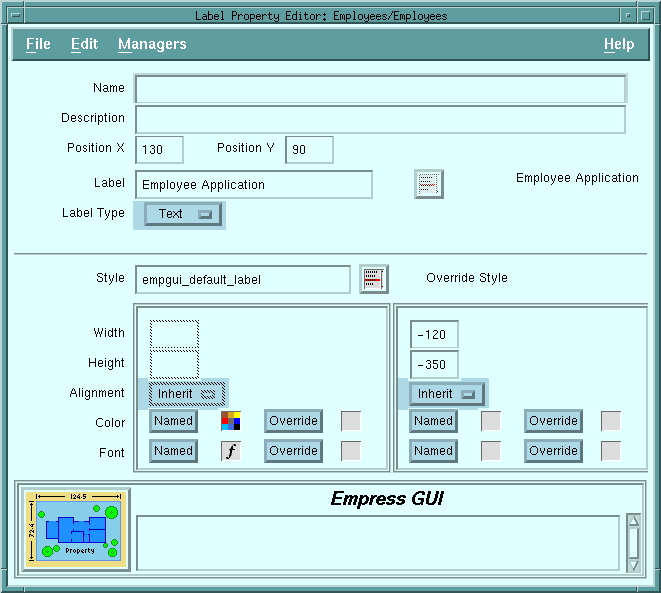 Figure 4-17 Label Property Editor
(Please note that your Position X and Y entries, and Width and Height in the Override Style, may not have exactly the same numbers as shown. This depends on how large you made the label and where you placed it.)
In both cases, you should see the label with the text inside.
For each one you will click on the Label icon, then click in the window where you want the label to appear.
You will then enter text into each label using one of the two methods above.
The window with the labels should look like this:
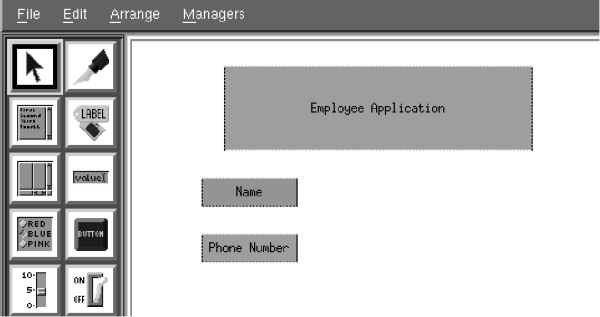
Figure 4-18 Window with Label
4.2.2 Tidying Labels
To make both labels the same size:
To do this, take the following steps:
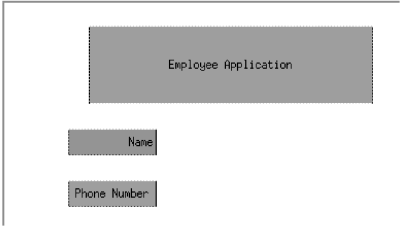
Figure 4-19 Window with right-aligned label
Position a reasonably sized field alongside the Name label. Use the property editor for the field to give it the name, name. (Case is important, and the name must be exactly this for the script action we will add to the field later.)
The Property Editor is brought up by clicking the third mouse button on the background and selecting Properties. Enter name into the Name field then press File, Set & Exit.
Repeat for the phone number field, calling it phone.
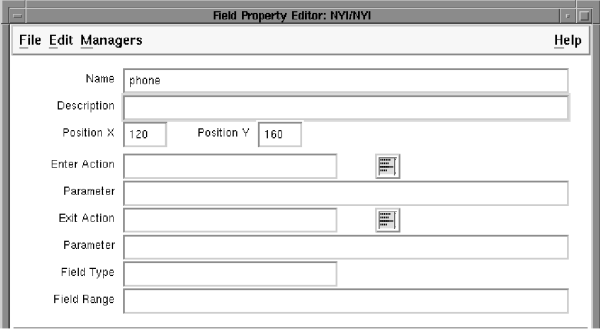
Figure 4-20 Property Editor for phone number field
Press File, Set & Exit to save.
(Note again, that your field position may differ slightly from the numbers
shown. Thats OK.)
4.2.4 Moving Groups of Fields
If you want to move fields as a group, (for example, a field and its label);
drag a box around them all, position the mouse pointer in either the field
or the label (not between them) and drag it.
You will see the whole group move as a unit, (denoted by the dashed box until you release the button).
It is not necessary to be particularly precise about the size of fields initially, because it is easy to experiment and change them later. Subsequent decisions about font sizes, for example, are likely to affect your choice of field sizes.
Your screen may end up looking something like this.
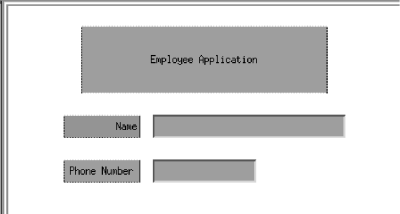
Figure 4-21 MAINWIN with fields
4.2.5 Saving Your Work
It is a good idea to save your work periodically. Select File,
Save from the menu bar whenever you have a result that looks good.
4.2.6 Testing the Result
You can get a fairly good idea of a windows appearance from the component
editor, but to see what the real thing will look like in an application,
select File, Run. (If you dont save first, the system
will ask you if you want to.)
You will be asked if you want to compile the application, and then if you want to link the application. Answer Yes in both cases.
You should see something like this when the application is running:

Figure 4-22 Run Window
You will probably have some variations in the size and location of the fields. It doesnt matter very much if they are too large, but if they are not tall enough, you may not see the text properly. You can try entering text into the fields, to see if they are a reasonable size for your font. Use File, Exit in your application to exit the application and return to the Component Editor. For the moment, we are not going to worry about the appearance, but are going to add some actions to the application, by attaching Enter and Exit scripts to the application itself. Select File, Save & Exit from the Window Component editor, which should take you back to the Application Manager.
Make sure that your Employees application is highlighted in
the application list.
4.2.7 Adding Scripts
Select Tools, Application Module Manager from the menu
bar, which will bring up the Application Module Manager. From there, ensure
that Employees is highlighted, and choose File, Properties
from the menu bar. (The PUBLIC modules are included by Empress, because
they contain some generally useful routines and styles shared by applications.
We will use them later when adding styles. For the moment, ignore them.)
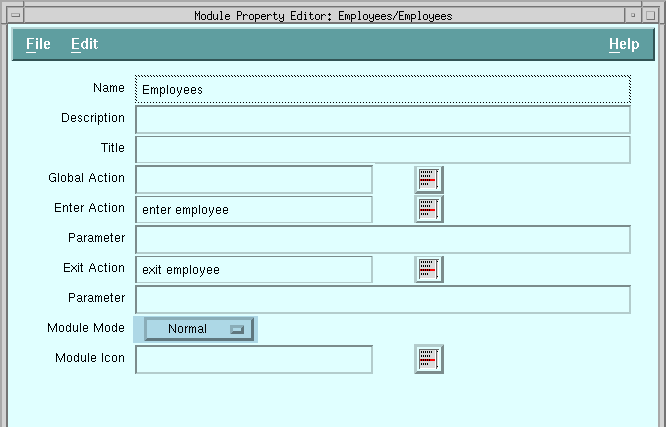 Figure 4-23 Module Property Editor
Key in the Enter Action and Exit Action names, exactly as shown. (The names are used as identifiers by the system, so both spelling and case matter.) You will notice that spaces may exist in the names of actions (and applications, fields, etc.) within the Empress GUI Builder.
Select File, Save & Exit.
Now, we will write the enter and exit actions themselves. From the Application Module Manager menu bar, select Tools, Action, which will bring up the Action Manager screen. You will see there are no actions in the action list for this application so far.
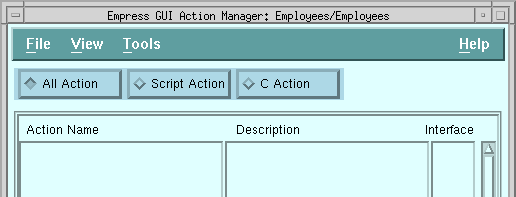
Figure 4-24 Action Manager
Select File, New, New Script Action from the menu. (This shows the use of a cascading menu. After clicking on File, New follow the arrow until the cascading menu is shown. Then click on New Script Action.)
You should now see the Action Property Editor screen.
Key enter employee in the Action Name field, a comment in the description field, and the script action itself into the text field.
The script should be exactly as it is shown below, (although the comment is optional).
/* This script displays the name and phone number of the first employee
*/
open table employee read;
declare cursor1 cursor for
select name, phone from employee;
open cursor1;
fetch next from cursor1;
call empgui_objects_set(MAINWIN, cursor1);
You can find a full explanation of calls within the scripts by referring to the Empress GUI Builder: Script Language Reference manual.
Your Action Property Editor screen should look like Figure 4-25:
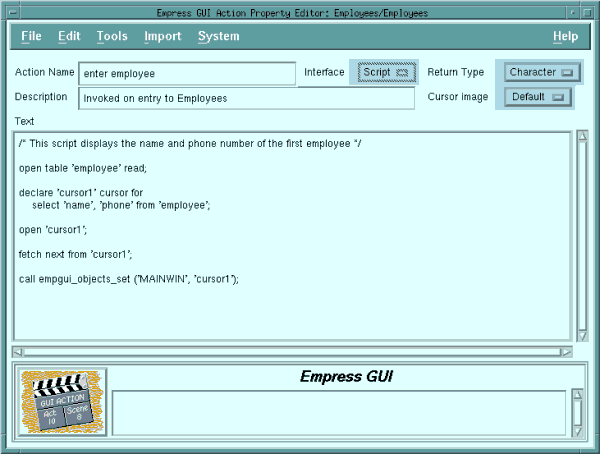
Figure 4-25 Action Property Editor
Please note the use of quotes around the identifiers which are not variables, (such as table names, cursor names, fields names, etc.)
The quotes can be single or double, but should be there (and paired).
Press File, Save & Exit to save the completed action.
Choose File, New, New Script Action again to write another action. Enter a name exit employee and description (such as Invoked on exit from Employee), for the action.
Key in the script as shown.
close cursor1;
undeclare cursor1;
close table employee;
If you prefer to work with the system editor, you can select System, Editor from the menu bar. The system editor (usually vi) will be invoked for the text field. After you write the text, save and exit from the system editor in the normal manner, (usually :wq in vi). The text will be reflected back into the Empress GUI Builder text field.
Press File, Save & Exit.
Now we run the application and test the enter and exit scripts. Press File, Exit to get out of the Action Manager, then press File, Run to run the application. After compiling and linking the application, you should see your application with the first name and the phone number displayed.
If either or both of the fields remain blank after selection, check the names of your fields (name and phone) and scripts (enter employee and exit employee). Remember that case matters. Also, look for an error in the scripts, especially enter employee.
(To check the names of the modules actions, use File, Properties from the Application Module Manager screen. To check the actions themselves, use Tools, Action, then File, Properties for each action.
To check the field names, use Tools, MAINWIN Component Editor from the Application Module Manager screen, then check the properties of the fields by bringing up the Property Editor.)
Before we start improving the screens appearance, lets add a couple of push buttons and their actions, so that we can see other records in the table.
Exit the application if it is still running, then select Tools,
MAINWIN Component Editor from the menu bar.
4.2.8 Adding Push Buttons
Select the push button icon from the toolbar. Drop a default-sized button
below the fields in the window.
Select the push button icon again, and place a second push button next
to the first in the window. These will eventually be the Next and Previous
buttons for navigating through the employees table. (See Figure
4-28.)
4.2.9 Adding Actions for the Push Buttons
We will write the actions for the push buttons now.
Select Managers, Action Manager from the menu bar.
Select File, New, New Script Action, and then use the Action Property Editor to create the action scripts for the push buttons we have just added. The first Action Name is next, and its Text is:
fetch next from cursor1;
call empgui_objects_set (MAINWIN, cursor1);
Press File, Save & Exit.
Follow the same steps to create an action called prev, with a Text field that looks like this:
fetch prior from cursor1;
call empgui_objects_set (MAINWIN, cursor1);
Press File, Save & Exit. Now you should see four actions in the applications action list.
Then press File, Exit to go back to your main window.
4.2.10 Attaching Actions and Labels to the Push Buttons
Select the first push button in the window. Then click on File,
Properties from the menu bar (or use the pop-up menu) to invoke
the Push Button Property Editor. Next to the Action field, you will see
a pick-list icon.
Click on this. It will bring up a list of all actions known to this application (many of which are from the PUBLIC modules). Select next from the list and OK. The action name, next, will be carried back to the Push Button Property Editor.
Actions do not have to be created before they are attached to components, but if you run a module that tries to use a non-existent action, it will generate a run-time error. It is easier and more reliable to define actions first, then pick their names from a list, than it is to assign names in the component property editor and remember or record them until you can create the corresponding actions.
Enter Next into the label field. Your screen should look like this:
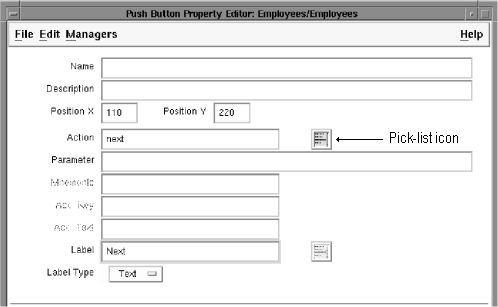
Figure 4-26
Return to the Window Component Editor with File, Set & Exit.
In the same way, create another button, give it the action prev (by choosing from the Pick-list) and give it a label, Previous.
Then File, Set & Exit.
Now, your component layout should look like Figure 4-27.
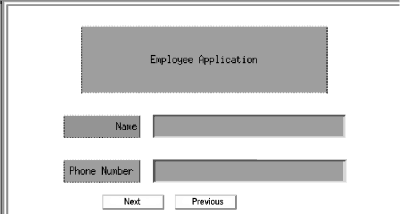
Figure 4-27 Screen with push button
Press File, Save, then File, Run. After compiling and linking, you should see a result like this:
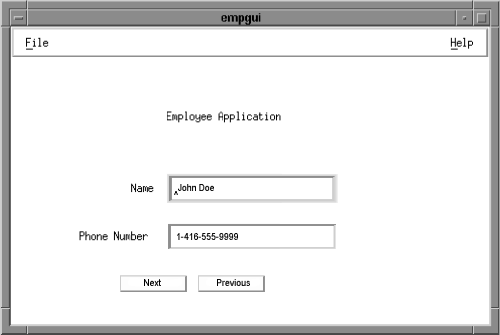
Figure 4-28 Run window
Try using the Next and Previous buttons to move forwards and backwards in the table. If you try to go beyond either end, the fields will go blank, (since we did not add in handling of this condition).
Now you have a real database application. Improving the appearance is the next step. We will do this in the next chapter by creating some styles.
Click on File, Exit to leave your application, then leave the Window Component Editor, again with File, Exit, and leave the Application Module Manager with File, Exit.
You should be back at the Application Manager screen.